Key Features and Functionalities of DMC Software
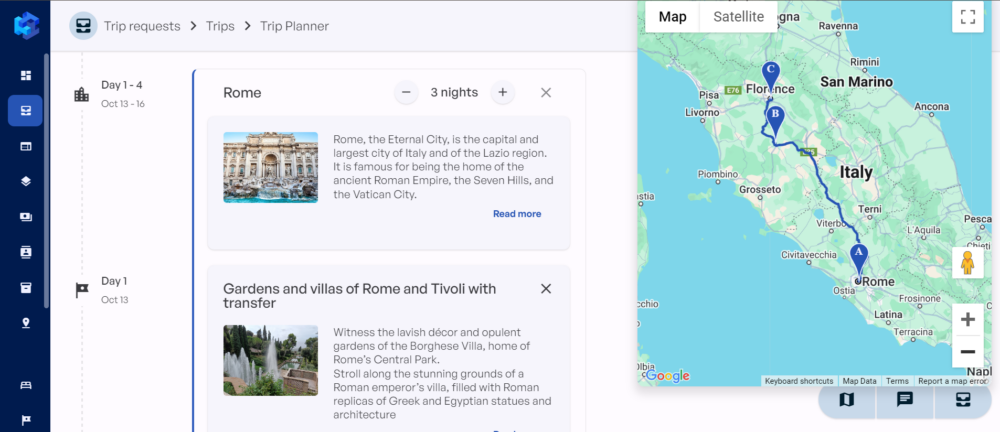
Are you looking for new software or to replace the existing one?
DMC software such as TripMatrix can substantially reduce your operational costs by centralizing all your tools into one dedicated system.
Eliminate collaboration tools, Excel sheets, CRMs, and repetitive manual work and replace them with efficient DMC software.
We’ll walk you through the key features of DMC software, show you how to build trips, and provide insight into DMC software integration into your business.
3 Key Features of DMC Software
1. Easy Supplier and Product Data Management
Considering you’re working with multiple suppliers, it’s important to easily navigate through all your suppliers and their products. Add suppliers to a dedicated contact list. Here is how you add and manage contacts inside TripMatrix.
For each supplier you can fill out the following information in TripMatrix DMC software:
- Supplier company details
- Address
- Main contact
- Other contacts
- Terms of service
- Default margins
- Cancellation policy
- Payment policy
When you’re working in a team, it’s crucial to have a reliable collaboration system.
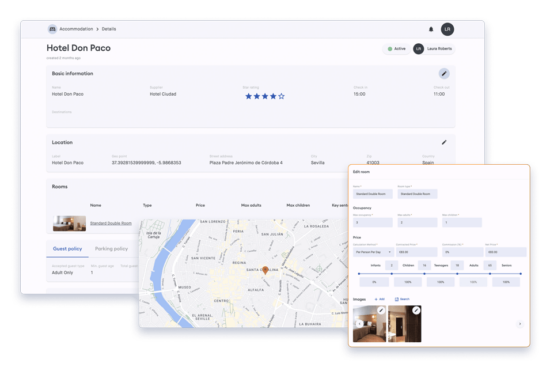
With the supplier overview in DMC software, you’ll see who and when modified the supplier information. TripMatrix DMC software provides a product inventory, too.
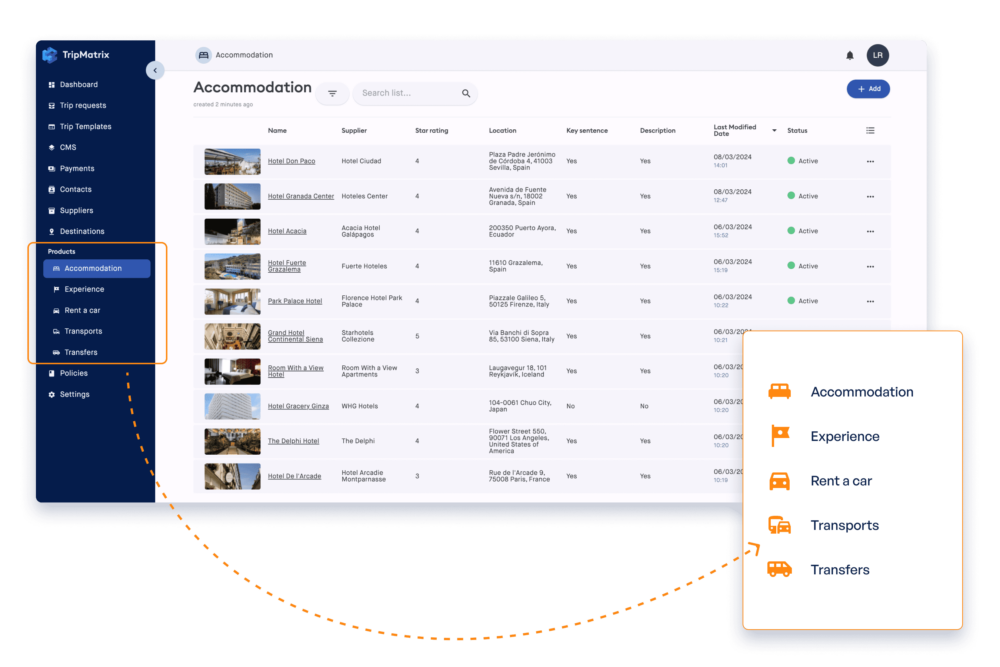
It’s convenient to browse through different product categories; accommodation, experience, transportation, and additional services.
Just like with a supplier list, it’s possible to see who and when made the latest modifications to each product. With all the suppliers and products uploaded to TripMatrix, it’s simple to build trips. You just need to add selected products and build trip.
Add and Manage Products Inside TripMatrix
2. Accurate Pricing Automation
TripMatrix destination management company system has built-in policy settings.
Within policy settings you can set:
- Payment policies
- Cancellation policies
- Default cost policies
- Trip preparation fee policy
In the payment policy tab, you can adjust when the payment needs to take place. For instance, you can have a payment policy where clients pay 30% of the total trip price in a booking, and then pay 70% three weeks before their arrival.
This can serve as your default policy, automatically applied to every trip offer. However, you have the flexibility to customize the payment policy for individual trips, allowing for more than two installments if needed.
Cancellation policy in the TripMatrix destination management company system can be changed for each trip offer, supplier, and product.
Additionally, in a default cost policy, you can add margin and manipulative cost percentages. There’s also a dedicated tab for creating a trip preparation fee policy.
Lastly, you can edit the price policy. All policies mentioned will automatically apply to your trip offers. However, it’s possible and easy to update and change policies for each trip.
3. Efficient Trip Builder
When you set up policies and add suppliers and products to the TripMatrix destination management company software, you can start building trips.
Within the “Trip requests” tab in a menu, it’s easy to create new trip requests, add new ones, or browse through existing trip requests with a search bar.
There’s a separate “Trip” tab with all the created trips. Each trip can be copied and modified for new or existing clients.
Ready to find out how to build a trip with the TripMatrix destination management company system?
Building a Trip with DMC Software
Building a trip using TripMatrix improves cost and time efficiency.
It eliminates manual work, replaces multiple tools, and allows you to accommodate more clients.
We’ll show you how to easily build a trip with destination management company software in the step-by-step guide below.
Step 1: Create a Trip Request
Since you work with travel agents, tour operators, corporations, and event planners, there’s a chance the majority of your trip requests will come through their companies.
TripMatrix DMC software has an integrated CRM system. CRM allows you to add both individual contacts and companies. For each company, you can add new or connect existing contacts.
This way, you’ll have a better overview of all company contacts instead of wasting time searching through individual contacts.
When you’ve received an inquiry, you can start by creating a trip request.
Click on the “Trip requests” dedicated tab in the TripMatrix destination management company software. On the upper right corner of the screen, you’ll see the “Add” button.
When you’ve clicked the button, fill out all the information in a pop-up window. Insert the name of the trip, write a customer name, and choose a source of inquiry from the dropdown menu. Lastly, put in all the request notes.
You can include the number of passengers, budget, accommodation, transportation, and experience preferences.
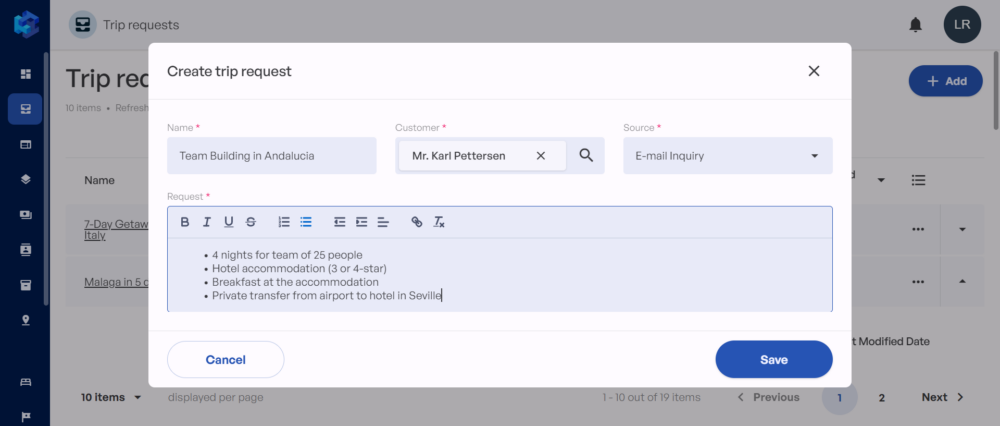
Create Trip Request
Step 2: Build a Trip
Now that you have finished creating a trip request, the next step is to build a trip.
In the bottom right corner of the screen in the “Trip requests” module, you’ll see the “Add trip” button.
By clicking on the button in TripMatrix DMC software, you can choose between creating a new or copying an existing trip.
If you have an occurring customer with similar requests, you can use the existing trip as a base.
For this article, we’ll select “New Trip”. In the pop-up window, you’ll get an option to create a custom trip, copy the trip, or choose from templates. We’ll go with “Custom trip”.
Here, you should write the name of the trip, mark if it’s a B2B customer, and include several passengers, payment currency, and the start date of the trip.
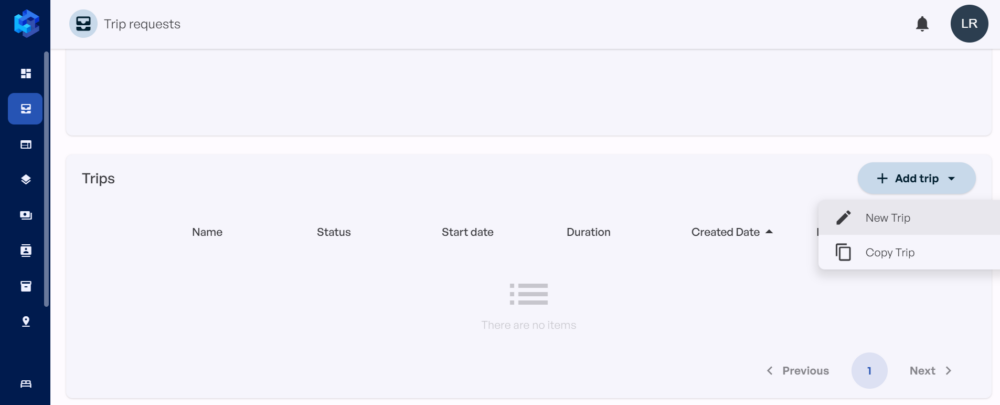
Add New Trip
Once you’ve saved all the information in a destination management company system, you can edit destination details such as:
- key sentence,
- description,
- notes,
- included in the price,
- excluded from price,
- optional supplements.
Additionally, you can generate destination photos from Google Images.
Eliminate time for image searching and uploading. Type in your destination into a search bar in a pop-up window. Use existing photos and include only the ones you like.
After adding all the destination details, type in each passenger’s information. When you’re done with passenger information, proceed to the “Trip Planner” tab.
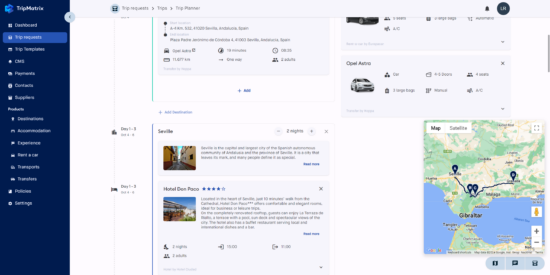
Start with choosing your destination or destinations. In a TripMatrix destination management company system you can build multi-destination trips, too.
For our trip, we’ve chosen Seville and selected a 4-night stay.
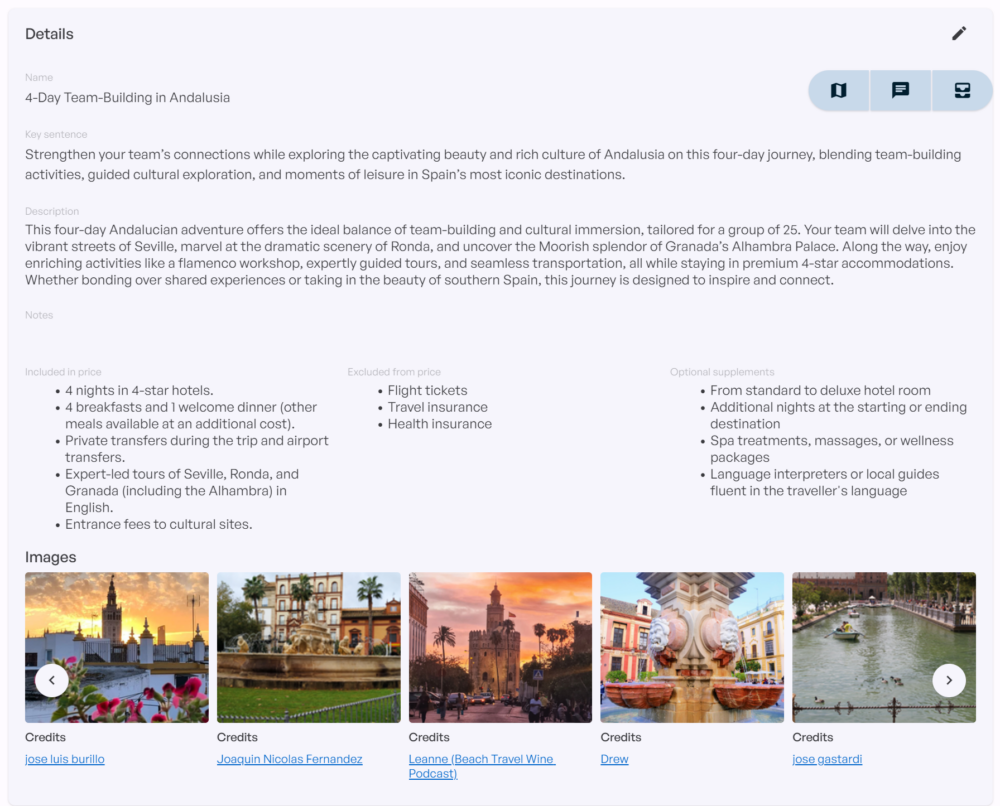
Trip Details
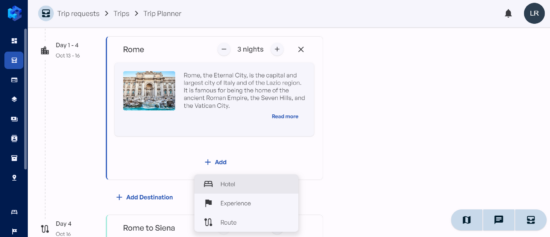
The next step is to add accommodation. Under the destination, click the “Add” button. You can add a hotel, experience, destination, route, or an ad-hoc item.
Since we have 25 passengers, in the hotel section we can allocate each person to individual or shared rooms.
In the team building trip scenario, there might be 5 senior managers and 20 middle and junior employees. For instance, we can join 20 passengers in shared rooms and 5 in their rooms.
When you’re assigning the rooms, the passenger list from before comes in handy. You can easily allocate each person by name and surname to their room, avoiding potential errors.
Once we’re done with the destination and accommodation portion of the trip building, we can join transportation, experiences, and other items to the trip.
Then, edit the day-to-day itinerary.
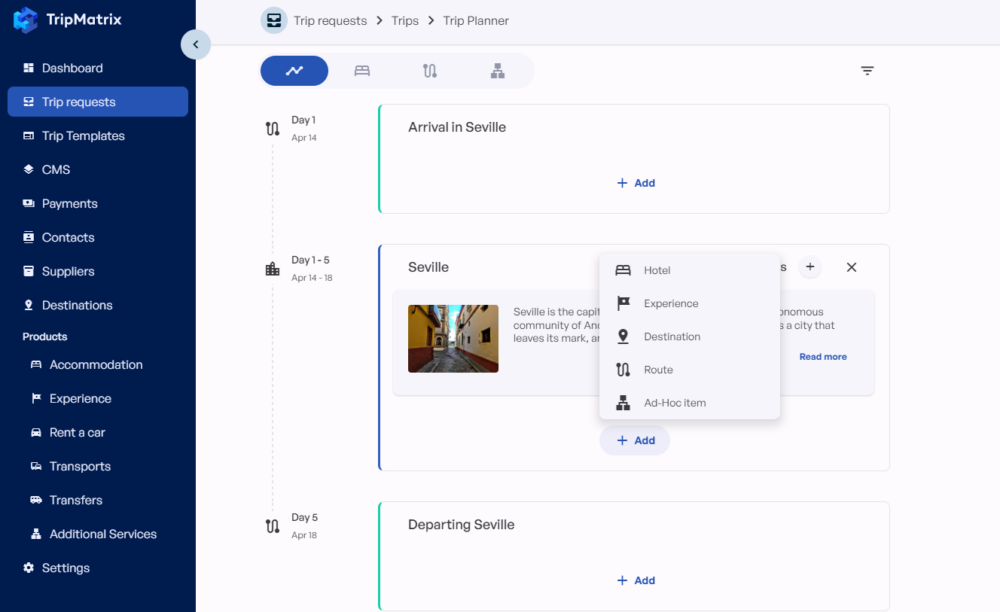
Itinerary Builder
Step 3: Adjust the Pricing
Before sending an offer to a client, make sure all the pricing is correct.
In the dedicated “Pricing” tab you can edit individual product pricing, including:
- margin
- calculated price
- the difference in price
- manipulative costs
- selling price
- base price
Plus, you can edit the cost policy for each trip. Update margin, manipulative costs, and preparation fee.
All the pricing changes in the destination management company system will automatically be accounted for in the final trip price.
Additionally, you can adjust information in the “Policies” tab. Review your cancellation and payment policies for individual items and a full trip.
When you’ve ensured everything is in order, click “Send offer”. Clients will receive your offer via email.
After making the final changes, proceed to the “Payments” tab.
TripMatrix has a Stripe integration allowing you to generate a payment link from the destination management company system.
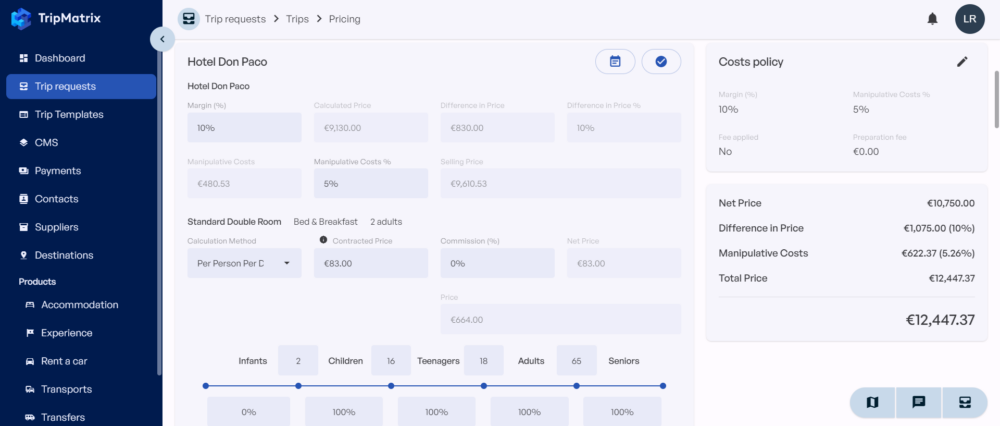
Pricing Details
How DMC Software Integration Works?
In contrast to other DMC software, TripMatrix is extremely easy to integrate into any business. DMC software integration doesn’t require a long installation or onboarding process.
Since our solution is cloud-based, you won’t need any onsite installation. TripMatrix is ready to use the moment we provide you with login details.
Anytime you want to use TripMatrix DMC software fill in your login details and you’re good to go.
In addition to the simple DMC software integration process, TripMatrix is accessible with any device. It’s convenient to use on-the-go. You can quickly check details on your phone or work remotely on your laptop.
The only thing you’ll need to do to get started is to add your contacts, suppliers, and products. All the contact, supplier, and product information is editable.
In case you’re working with a team, TripMatrix DMC software supports unlimited users per company account.
Each team member will have access to all the contact, supplier, and product information in real-time.
Eliminate Costs with TripMatrix
On top of all the TripMatrix DMC software features, you’re saving money, too. Forget paying for installation, onboarding, training, and a monthly subscription to use DMC software.
TripMatrix doesn’t require any installation. Simply log in and you’re ready to work. There’s no need for a long onboarding or training process.
When you add suppliers and products, you can start creating trips straight away. The best part is you only pay when you sell.
While many DMC software charges monthly subscription fees, TripMatrix is commission-based. In case you’re operating seasonally or don’t have regular clients, a commission-based pricing plan is a more cost-friendly option.
Want to know more? Learn more about our pricing, contact us for a demo, or get more information from our blog section.
Interested to see how
TripMatrix can supercharge your
travel business?
Request a Demo
Published on: November 24, 2024
